
How jobs, stops, and routes work together
Follow customer work from the moment a job is created, through route planning and dispatch, to the driver's last completed stop.
How the pieces fit together
A job holds the customer's request. A route organizes the work for the driver. This lets one driver serve several jobs efficiently without turning every job into its own trip. Routes are always part of execution, but manually building one is optional.
- JobCustomer, service, pricing, notes, schedule, and the stops that make up the work.
- StopsPickup, dropoff, or waypoint actions at specific addresses and times.
- RouteAn ordered list of stops you can plan yourself or create by assigning a job directly to a driver.
- ExecutionAs the driver updates each stop, the job's progress updates too.
| Object | Think of it as | What it controls |
|---|---|---|
| Job | The customer order or service request | Customer, service type, price, payment, notes, workers, and overall status |
| Stop | One physical task | Address, pickup/dropoff/waypoint type, time window, service time, contact, and required proof of work |
| Route | The driver's list of stops | Stop order, driver, vehicle, starting and ending locations, distance, duration, and route status |
A two-job example
Job A has a pickup and dropoff. Job B also has a pickup and dropoff. You can place all four stops on one route in the most useful order:
Job A pickup → Job B pickup → Job A dropoff → Job B dropoff
The jobs keep their own customers, prices, notes, and statuses. The route only determines which driver performs the stops and in what order.
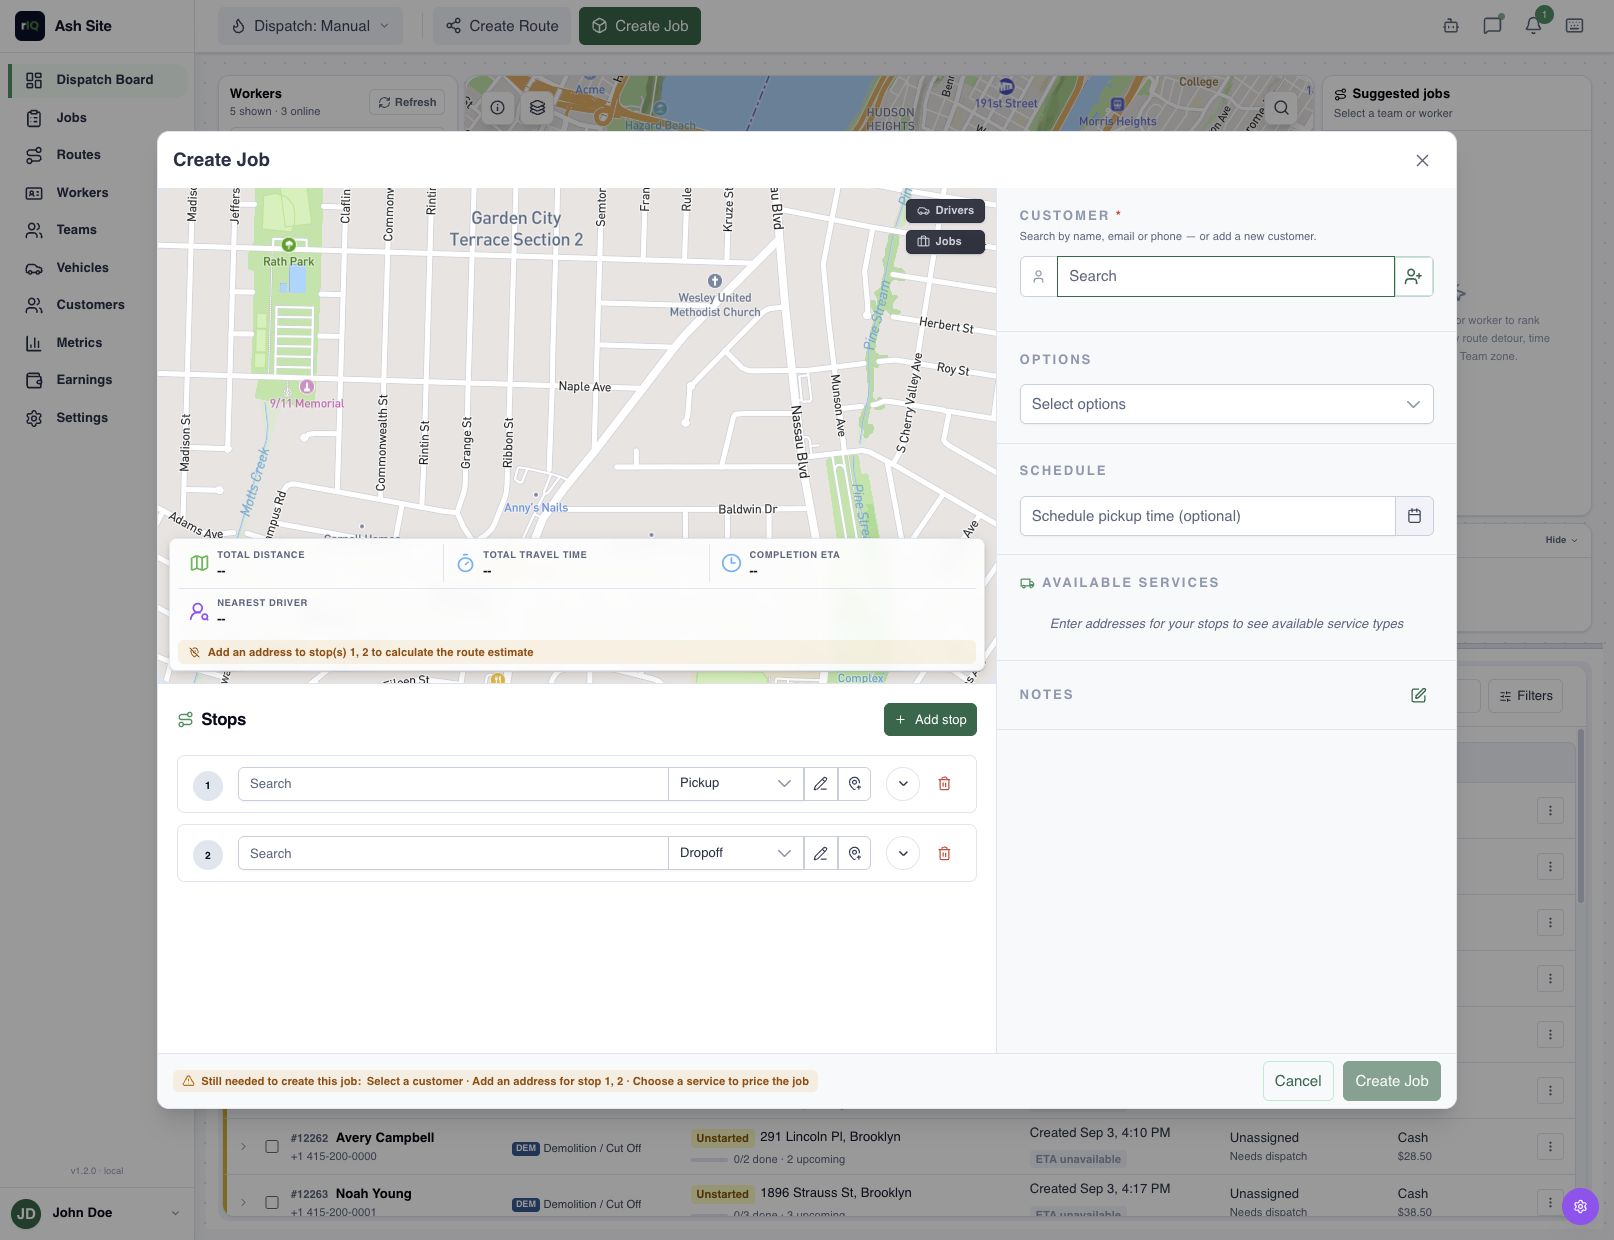
1. Create the job and its stops
- Open Jobs and select Create Job.
- Select or create the customer, then choose the service type.
- Add at least one stop. Choose Pickup, Dropoff, or Waypoint and confirm the address.
- Add time windows and expected on-site service time when they matter. These affect route feasibility and ETAs.
- Add customer, driver, and internal notes for the people who need them.
- Save the job. Saving creates the work; it does not require a route yet.
A new delivery-style job normally begins in Received. Your site may use different labels because job workflows can be customized.
Administrators can connect service defaults, driver requirements, status labels, and proof of work in Configure how jobs behave.
2. Plan a route when you need to control the run
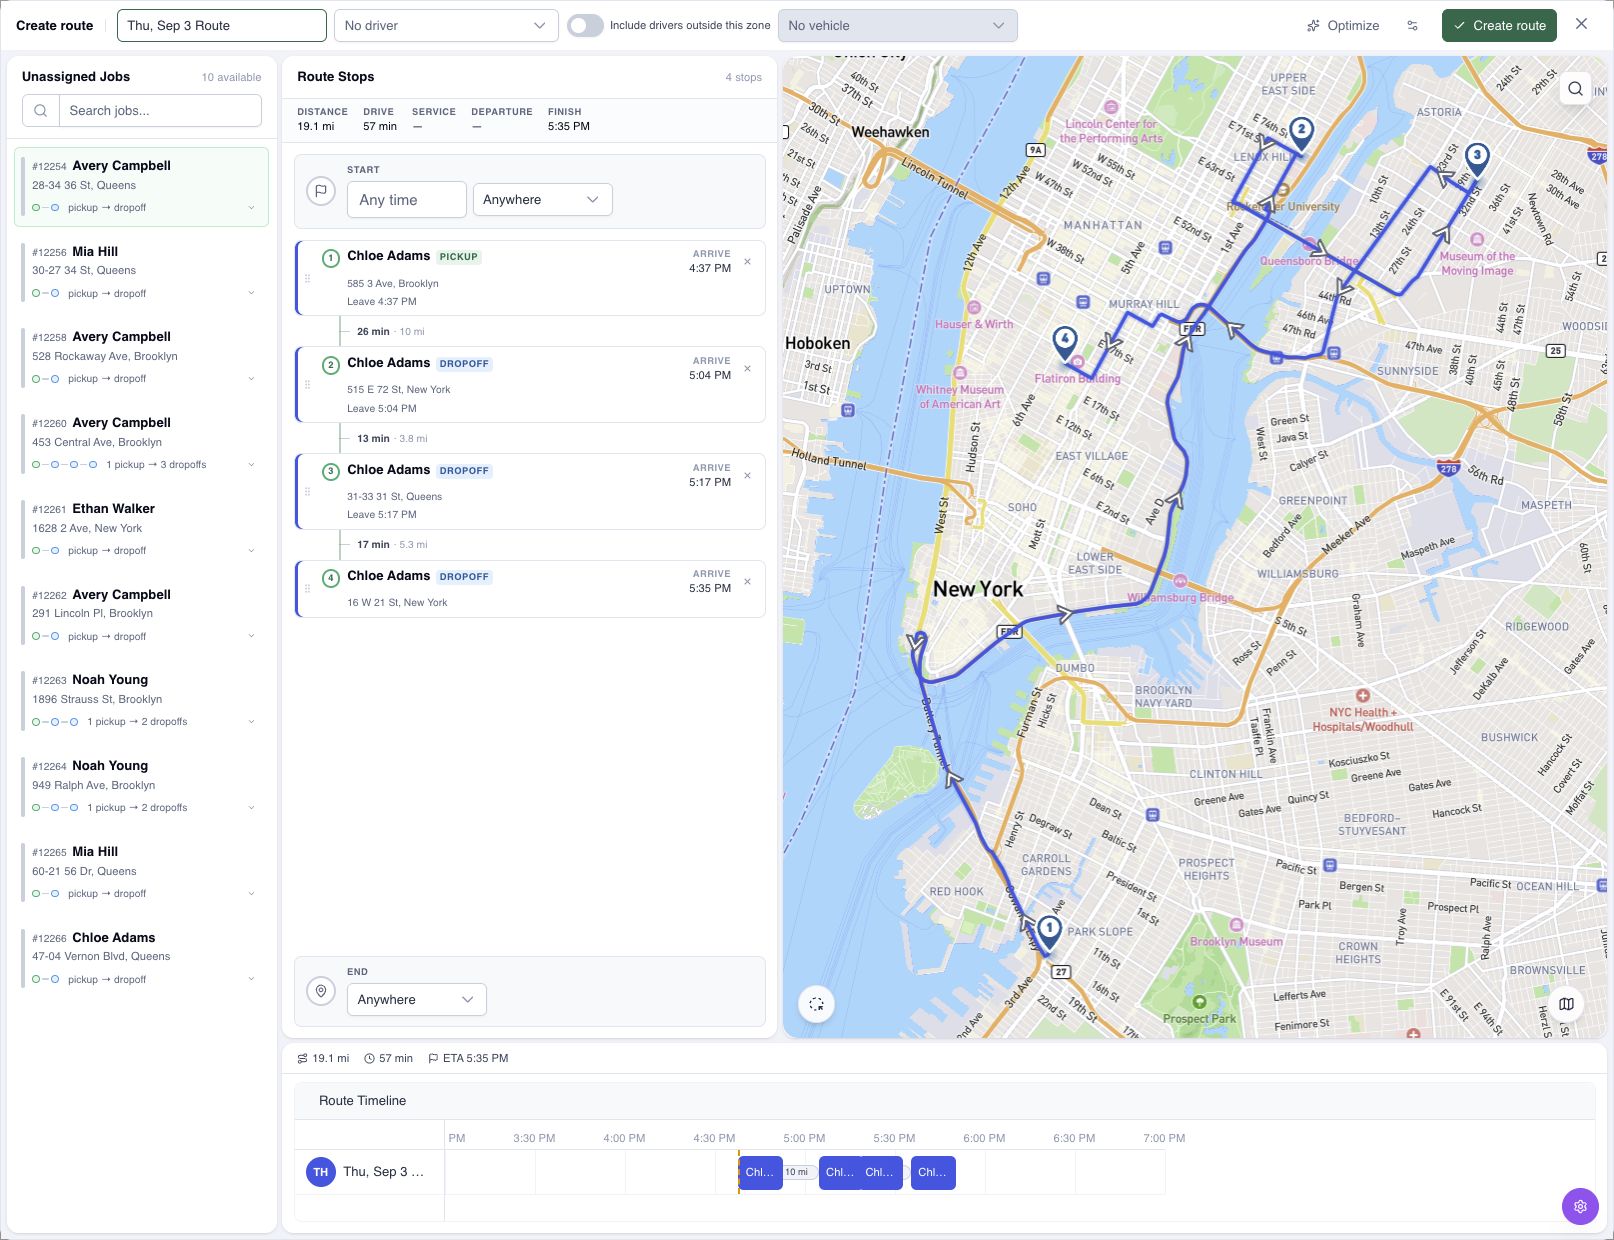
This step is optional. Build a route manually when you want to arrange several jobs, preserve a particular stop order, set starting or ending locations, or review the whole run before choosing a driver. Create one from selected jobs or open Routes and build it there.
The selected jobs' available stops are added to the route individually, so stops from different jobs can be interleaved.
- Choose the jobs or stops the driver should perform.
- Set an optional start location, end location, and planned start time.
- Drag stops into a manual order or preview an optimized sequence.
- Review time-window, schedule, and capacity warnings.
- Save the route to persist the chosen order.
You can preview a suggested order, ETAs, distance, and warnings without changing the route. The route changes only when you apply the suggestion and save.
3. Assign and dispatch the work
You can assign either a job or a route. For a direct job assignment, choose the driver and, when required, a vehicle; RouteIQ Dispatch Software creates or reuses the appropriate pending route and adds the job's stops automatically. The dispatcher does not need to create a route first.
When you planned a route in advance, assign that route to preserve its saved stop order. Either way, the driver's route becomes their ordered list of stops.
A driver can have more than one pending route, for example, separate morning and afternoon runs, but only one route can be started at a time. A stop can belong to only one active route, which prevents the same work from being dispatched twice.
4. The driver works stops; statuses roll up
The driver starts the route and advances each stop through its workflow. The default stop progression is Unstarted → Started → Arrived → Completed, with Cancelled as the other final status.
- Required stop actions, such as a signature, photo, or scan, can block the next status until they are completed.
- When work begins on a stop, the assigned job moves into its started group.
- When all of a job's stops are finished or cancelled, the job becomes completed or cancelled.
- The route is not completed automatically. The driver completes it after every stop and job is finished or cancelled and no payment remains pending.
Default job labels are Received, Ready, Dispatching, Assigned, Started, Completed, and Cancelled. Customized sites may show different labels, while the same broader pending, assigned, started, completed, and cancelled groups still drive behavior.
Changes, reassignment, and cancellation
- Reorder or re-optimize: update the stop sequence and save it. Completed routes are locked.
- Remove or delete a route: the work is released for reassignment; its jobs are not cancelled.
- Cancel a job: its remaining stops are cancelled and removed from active routes.
- Edit stops: route ETAs are recalculated when membership or order changes, and ETA notification rules may be re-armed.
Troubleshooting
A stop cannot be added to a route
Confirm that the stop and its job are active and that the stop is not already on another active route.
The optimized order disappeared
An optimization preview does not change the route by itself. Apply the suggestion and save the route.
The route cannot be completed
Look for an unfinished stop, a job that is not completed or cancelled, an incomplete required stop action, or a pending payment.
The job status did not change when expected
Check the status of every stop. One unfinished or uncancelled stop keeps the job open.