
Create and import zones
Draw or import service areas, then use them for dispatch, pricing, service warnings, and location notifications.
What zones control
- BoundaryA polygon or circle identifies the area.
- ClassificationStops inside inherit the highest-priority active zone.
- Operational ruleAllow, warn, or block service and select in-zone teams.
- AutomationApply price rules and enter, exit, or dwell notifications.
Zones may overlap. When an address falls inside more than one active zone, the zone with the highest priority wins for serviceability. Pricing can also use the job's origin and destination zones to select the most specific rule.
| Restriction | Behavior | Good for |
|---|---|---|
| None | Service is allowed normally | Named territories, team coverage, standard pricing |
| Caution | Service remains available, with a warning | Remote areas, access constraints, surcharge review |
| Banned | New work is blocked unless an authorized operator overrides it | Unsafe, unsupported, or prohibited areas |
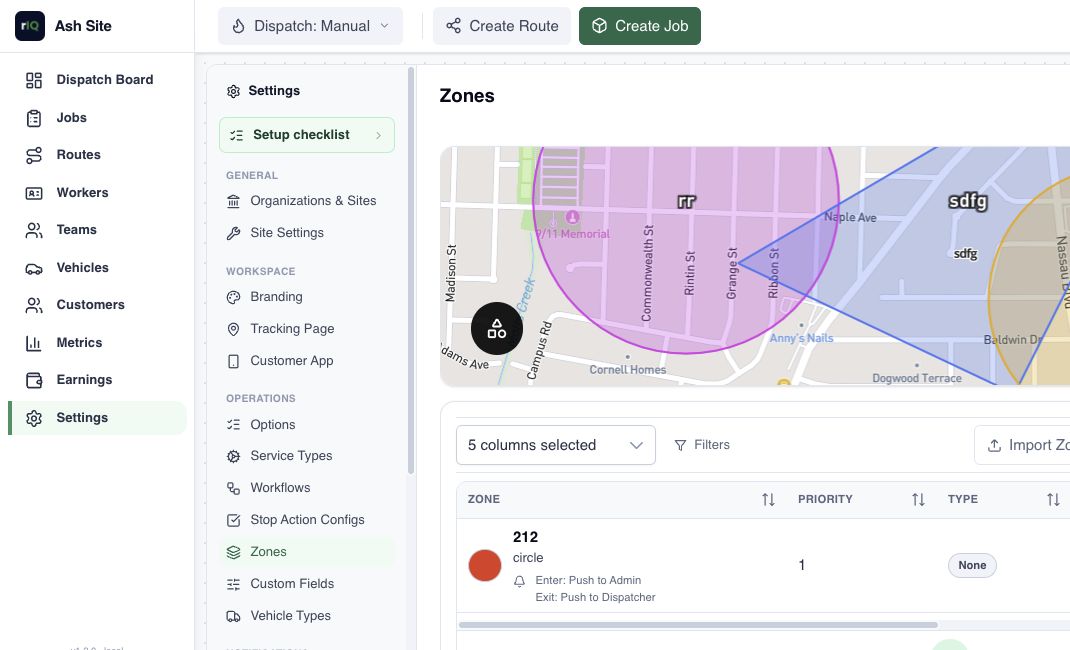
1. Draw a zone
- Open Settings → Zones and select Add Zone.
- Choose polygon or circle drawing.
- Draw the boundary on the map.
- Name the zone, choose a color, set its priority and service restriction, and leave it active when it should participate immediately.
- Save, then select the table row to focus the map on that boundary.
2. Import GeoJSON or KML
- Prepare a
.geojson,.json, or.kmlfile no larger than 25 MB. - Open Settings → Zones and select Import Zones.
- Choose the file. Each valid polygon is created, and the results show how many items were added or skipped.
- Keep the results on screen and review every new zone before relying on it in production.
A bad point or route in the file does not prevent valid polygons in the same file from being imported.
Prepare a clean map file
- GeoJSON: use a Polygon or MultiPolygon root, Feature, or FeatureCollection. Only the outside boundary is used; holes inside the shape are ignored.
- KML: use Placemark polygons with an outside boundary. Point-only placemarks cannot become zones.
- Names: set a GeoJSON
nameproperty or KML Placemark name. Missing names become “Imported zone 1,” “Imported zone 2,” and so on. - Colors: GeoJSON may use a
colororfillstring. Otherwise a default color is used. - Coordinates: GeoJSON uses longitude, latitude order. Every polygon needs at least three valid points.
Draw circles in the dashboard. Imported polygons are active, with priority 0 and no service restriction, so the file cannot silently block customer work.
3. Review priority and restrictions
- Rename generic features and choose useful colors.
- Set a higher priority for the smaller or more specific zone when boundaries overlap.
- Change the service restriction only after checking the boundary at street level.
- Deactivate test or seasonal zones when they should stop affecting new work.
- Create a test job just inside and just outside the edge to confirm classification.
4. Connect zones to operations
- Teams: assign territories to teams. Zone-aware dispatch can prefer or require a team that covers the job's zone, depending on site policy.
- Pricing: attach non-default price rules to zones and use priorities to resolve overlapping rule matches.
- Notifications: configure enter, exit, or dwell notifications from the Geofence Notifications tab.
- Jobs: job creation records serviceability warnings and can block a banned address unless an authorized dispatcher or administrator overrides it.
For notification recipients and channels, see Choose the right notification.
Troubleshooting
Some features were skipped
Open the import warning and check the listed item numbers. Points, lines, missing shapes, inner rings without an outside polygon, and invalid coordinates cannot define a zone.
The wrong overlapping zone wins
Compare the active zones' priority values. The highest-priority zone containing the address controls whether service is allowed.
A driver or team is excluded
Check the zone assigned to the job, whether the team covers it, and whether coverage is required or only preferred.